
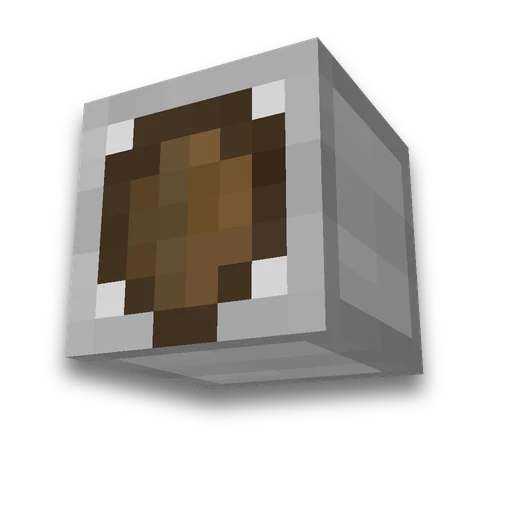
Minecraft shield generator
Items
Design a patterned shield and get its /give commandLearn more
Assemble the pattern like a loom: background color, then patterns on top — each with its own dye. Shields are made from in-game textures, and the command /give It is issued ready-made.
My Game select version
Save your preferences in this browser and apply them to supported tools. Settings in a shared link take priority. Wiki version labels are not affected.
Already have a command? Paste it to fill in the form
Pre-made drawing


Fabric color
Dye and pattern
- Dye: White
- Dye: Orange
- Dye: Magenta
- Dye: Light Blue
- Dye: Yellow
- Dye: Lime
- Dye: Pink
- Dye: Gray
- Dye: Light Gray
- Dye: Cyan
- Dye: Purple
- Dye: Blue
- Dye: Brown
- Dye: Green
- Dye: Red
- Dye: Black
-
 Add pattern: Base Dexter Canton (White)
-
 Add pattern: Base Sinister Canton (White)
-
 Add pattern: Chief Dexter Canton (White)
-
 Add pattern: Chief Sinister Canton (White)
-
 Add pattern: Base (White)
-
 Add pattern: Chief (White)
-
 Add pattern: Pale Dexter (White)
-
 Add pattern: Pale Sinister (White)
-
 Add pattern: Pale (White)
-
 Add pattern: Fess (White)
-
 Add pattern: Bend (White)
-
 Add pattern: Bend Sinister (White)
-
 Add pattern: Paly (White)
-
 Add pattern: Saltire (White)
-
 Add pattern: Cross (White)
-
 Add pattern: Chevron (White)
-
 Add pattern: Inverted Chevron (White)
-
 Add pattern: Base Indented (White)
-
 Add pattern: Chief Indented (White)
-
 Add pattern: Per Bend Sinister (White)
-
 Add pattern: Per Bend Sinister Inverted (White)
-
 Add pattern: Per Bend Inverted (White)
-
 Add pattern: Per Bend (White)
-
 Add pattern: Roundel (White)
-
 Add pattern: Lozenge (White)
-
 Add pattern: Per Pale (White)
-
 Add pattern: Per Fess (White)
-
 Add pattern: Per Pale Inverted (White)
-
 Add pattern: Per Fess Inverted (White)
-
 Add pattern: Bordure (White)
-
 Add pattern: Toothed border (White), requires pattern item
-
 Add pattern: Gradient (White)
-
 Add pattern: Base Gradient (White)
-
 Add pattern: Mural (White), requires pattern item
-
 Add trim: Globe (White), requires trim item
-
 Add pattern: Creeper (White), requires pattern item
-
 Add pattern: Skeleton Skull (White), requires pattern item
-
 Add pattern: Flower (White), requires pattern item
-
 Add pattern: Something (White), requires pattern item
-
 Add pattern: Rook (White), requires pattern item
-
 Add pattern: Flow (White), requires pattern item
-
 Add trim: Breeze (White), requires trim item
A dot in the corner — each pattern requires a separate item in the loom.
Layers — 1 of 6
Remove all patternsIn a loom, special patterns such as Creeper require the matching banner pattern item. A command can create the banner without it.
How to build in survival mode
- Flag: lime 6 lime wool and 1 stick in a crafting table.
- Layer 1: creeper Place the banner and black dye in a loom. You also need the Creeper Charge banner pattern item.
- Transfer to shield Pre-made flag and shield together at a crafting table. The flag is consumed, and the pattern is fully transferred.
What to carry with you
- 6 pcs lime wool
- 1 piece Stick
- 1 piece dye (black)
- 1 piece Creeper Charge Banner Pattern
- 1 piece Shield
Result
Minecraft /give Command
Command — 106 of 256
/give @p minecraft:shield[base_color="lime",banner_patterns=[{pattern:"minecraft:creeper",color:"black"}]]How to use the result
- Enable commands
Enable cheats in single-player or use operator permissions on a server; otherwise
/givewill not execute. - Paste into chat
T, then Ctrl+V and press Enter. Use a command block for commands longer than 256 characters; chat cannot send them.
- Or build by hand
No operator permissions — by the recipe 'How to craft in survival': steps in the same order as layers.
What to know about patterned shields
- Shields are not dyed — a flag is placed on it. Create the design on a banner using a loom, then craft it together with a shield. The banner is consumed and its pattern transfers to the shield, which can still be repaired.
- No more than six patterns. This is the loom's limit: it will not accept the seventh pattern. A command can give more, but such a shield cannot be crafted in survival — therefore, this is the same limit.
- Order matters. Each subsequent pattern layers over the previous ones and covers them with opaque areas. The same patterns in a different order produce a different shield.
- Ten patterns require a separate item — Creeper Charge, Skull Charge, Flower Charge, Thing, Globe, Snout, Field Masoned, Bordure Indented, Flow, and Guster. These pattern items are reusable and marked with a dot in the preview.
- Dye intensifies the texture, not filling it. The shield uses one fabric texture tinted pixel by pixel. It cannot appear brighter than the selected color, and the metal rim is unaffected.
- The shield drawing does not erase. A banner's top layer can be washed off in a cauldron, but a shield's pattern cannot. Start with a new shield to change the design.
- Item syntax changed in 1.20.5. The firework rocket was stored in an NBT (
BlockEntityTagAfter that — in componentsbase_colorandbanner_patterns. The command in the wrong format executes and produces a clean shield, saying nothing — therefore, the version must be selected here, not guessed.
The same pattern, but directly on the flag, is assembled flag generator: the flag command is taken from that item — the item that starts the survival shield.
Frequently asked questions
How to apply a pattern to a shield in Minecraft?
Apply a patterned banner to a shield in a crafting table. Dyes cannot be applied directly to shields.
Can you erase the pattern from a banner?
No: unlike a flag, a shield in a cauldron does not wash off. The pattern stays forever.
Why is the shield color not as bright as the dye?
The dye multiplies the shield fabric's texture colors rather than replacing them. The metal rim keeps its original appearance.







 Minecraft /give generator
